How to Lay Decking on Uneven Ground: 2 Simple Methods
Decking

How to Lay Decking on Uneven Ground: 2 Simple Methods

DeckingSloped Gardens

How to Lay Decking on Uneven Ground: Practical Methods for UK Gardens

Uneven or sloping ground is one of the most common challenges when installing decking in British gardens. Done properly, a deck on uneven ground can be just as solid, level and long-lasting as one on a flat site. Done poorly, it sinks, bounces, traps moisture and fails early.

The right method depends on the amount of fall, the finished height you want, soil conditions, and whether the deck will be low-level or raised. Below are the main approaches we use, updated with current techniques that work reliably in UK conditions.

1. Assess the Site First

Before choosing a method:

  • Measure the fall accurately (laser level is ideal; otherwise a taut string line + spirit level from the highest point). Note the maximum difference across the area.
  • Check soil type. Soft clay or recently disturbed ground needs better foundations than firm, compacted ground.
  • Decide the finished height relative to any doors or thresholds, and whether you need the deck to feel low or elevated.
  • Plan drainage — the finished deck surface should have a slight fall (typically 1:80 to 1:100, roughly 10–12 mm per metre) away from the house so water does not pool.

UK planning note: Decking that is no more than 300 mm above the highest adjacent ground level is usually permitted development (subject to overall garden coverage limits and protected area rules). Anything higher generally requires planning permission. Decks over 600 mm high also trigger building regulations requirements for structure and guarding (balustrades). Always check with your local authority.

2. Method A – Adjustable Pedestals / Risers (Best modern option for most uneven or gently sloping ground)

Best for: Uneven ground or gentle slopes with up to around 150–200 mm of fall, and low-to-medium height decks.
Why it works well: You create a level frame without massive excavation or variable-height posts. Pedestals sit on a firm base and screw up or down for precise adjustment. Excellent ventilation under the deck reduces rot risk.

Key steps:

  • Clear vegetation and organic material.
  • Lay a weed-control membrane.
  • Create a firm base: compacted MOT Type 1 hardcore (typically 50–100 mm) or concrete pads under each pedestal position. Never place pedestals directly on bare soil.
  • Set out pedestals in a grid that matches your joist spans (commonly 400–600 mm centres depending on joist size and board type).
  • Adjust each pedestal so the tops of the joists will be level (or with the required slight fall).
  • Lay the joist frame, then the decking boards.

Advantages: Fast, precise, minimal digging, good under-deck airflow.
Watch-outs: Pedestals need a solid, free-draining base; cheap plastic ones can degrade or sink on soft ground.

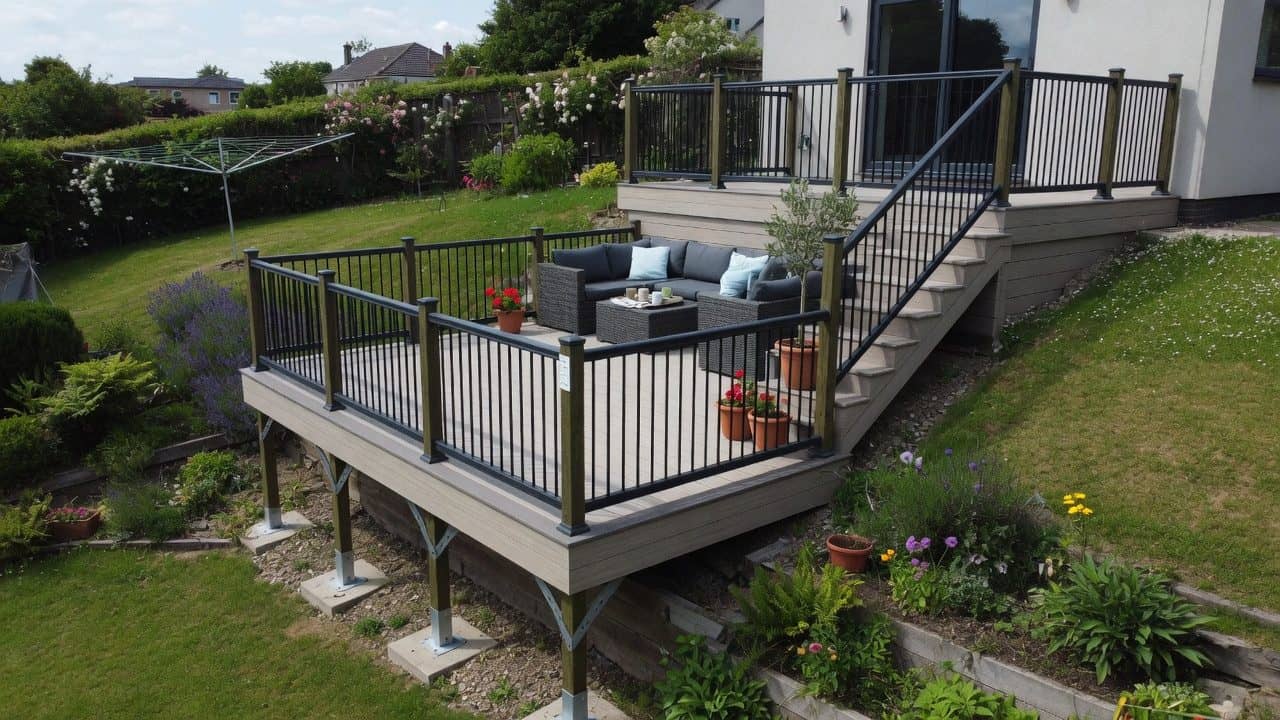
3. Method B – Post-Supported Frame (Best for steeper slopes or higher decks)

Best for: Noticeable slopes, or any deck that needs significant elevation (especially over 150–300 mm).
Why it works: Posts of different lengths create a level platform over falling ground.

Key steps:

  • Clear the area thoroughly.
  • Dig post holes to firm ground. Minimum depth is often 450–600 mm (or deeper on soft ground or for taller structures). Hole diameter is typically 300 mm+.
  • Use pressure-treated timber posts (minimum Use Class 4 for ground contact or structural support) or suitable alternatives. 100 × 100 mm is common for domestic work.
  • Set posts in concrete (proper footings, not just a thin “boot” of postcrete around the timber if the deck is raised or loaded). Keep the timber clear of the concrete surface where possible, or use metal post bases.
  • Once cured, cut or mark the posts so the tops (or the beams fixed to them) are level or follow the required fall.
  • Fix beams and joists securely. Use appropriate hangers, brackets and stainless or galvanised fixings. Add bracing on taller or more exposed structures.
  • Install decking boards.

Make edges safe with steps and/or barriers where the drop exceeds safe limits.

Advantages: Strong, suitable for steeper ground and higher platforms.
Watch-outs: More labour and concrete work; incorrect hole depth or soft ground leads to movement.

4. Method C – Levelled Sub-base with Pads or Short Supports (Updated low-level approach)

Best for: Low-level decking on generally lumpy but not steeply sloping ground.
Materials: MOT Type 1 hardcore, weed membrane, concrete paving slabs or blocks, treated timber frame, and preferably adjustable legs or packers.

Key steps:

  • Mark out and excavate so the finished deck surface will sit at the desired height (often 150–200 mm of excavation depending on build-up).
  • Compact the base, add and thoroughly compact a layer of MOT Type 1 (50–100 mm is typical).
  • Lay weed membrane.
  • Position solid supports (paving slabs or concrete blocks) under the main frame lines — edges and centre lines at least.
  • Build the deck frame and set it on the supports. Use adjustable decking legs or packers to achieve perfect level and the required fall.
  • Fix the boards.

This is essentially an improved version of traditional “slab and packer” methods. Modern adjustable risers make fine-tuning much easier and more durable than timber packers alone.

Essential Details That Make the Difference

  • Timber specification: Structural members should be strength-graded (C16 minimum is the usual domestic baseline) and treated to Use Class 4 where they are in or near the ground or provide primary support. Brush cut ends with end-grain preservative.
  • Joist centres: 400 mm centres is the most common and safest default for standard timber and many composite boards. Check manufacturer guidance — some composites need tighter spacing.
  • Ventilation and moisture: Keep the underside of the frame clear of the ground wherever possible. Good airflow dramatically extends life in the UK climate.
  • Drainage: Build in a slight fall. Ensure water can escape under and around the deck.
  • Fixings: Stainless steel or high-quality exterior screws. Avoid cheap zinc that fails quickly outdoors.
  • Soft or wet ground: Increase pad size, deepen foundations, or use ground screws / larger concrete footings. Point loads on soft soil cause progressive sinking.

When to Call in Professionals

Steep slopes, soft or waterlogged ground, decks attached to the house, anything over ~300–600 mm high, or complex multi-level designs are usually better handled by experienced landscapers. Correct foundations and structure are safety-critical and expensive to fix later.

A well-built deck on uneven ground should feel solid underfoot, drain freely, and last many years with minimal maintenance. The methods above cover the vast majority of real UK garden situations.

Related services

Prefer a professional install in Preston & the North West? Explore the services that match this guide.